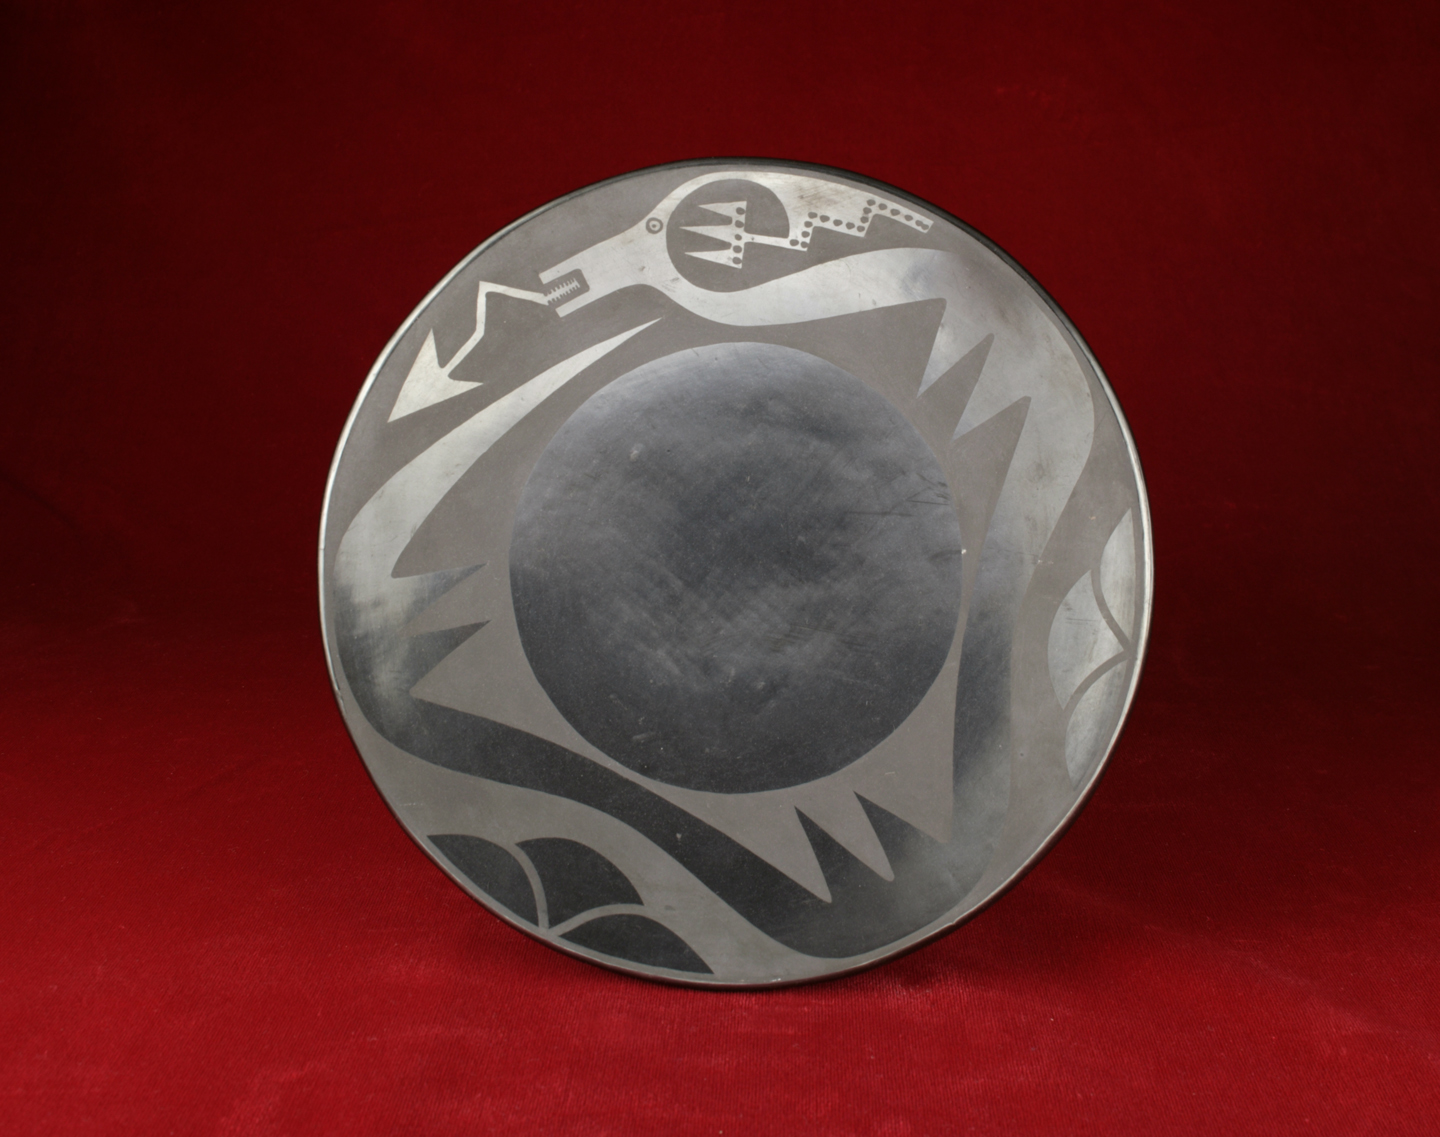
Students will discuss the process and design of the Plate by Maria and Julian Martinez. Then they will create their own design as either a plan on paper or on a clay tile.
Students will be able to:
- articulate commonalities seen in visual information and art from various cultures;
- identify and use patterns of visual information to guide the creation of a work of art;
- identify and use cultural and personal symbols; and
- experiment with different art media to create two-dimensional and three-dimensional art works.
Lesson
- Show students the image of the Plate by Maria and Julian Martinez from San Ildefonso Pueblo. Ask them to identify what they see and talk about whether it reminds them of anything they have seen before. Show students details from the “Details” section of the About the Art section. Point out that the black is not paint or glaze, but is a result of how the clay was fired. Ask students how they think the design on the plate was created. After giving students some time to think, explain that Maria burnished the nearly dry clay with a stone before it was fired until it was shiny. Her husband, Julian, then used a mixture of clay and water, called slip, to paint on the design. After the plate was fired, the designed area came out matte and the rest stayed shiny.
- Direct students’ attention to the design. Maria and Julian decorated their pottery with traditional Tewa [TAY-wah] designs. The serpent figure is called an avanyu (ah-VON-you). Julian and Maria’s daughter-in-law says that Julian was the first potter at the San Ildefonso Pueblo to use the avanyu design, which she thinks he got from paintings he found on shards of broken pottery from a long time ago. Share more information about the designs on Plate from the About the Art section.
- These designs were inspired by his culture. Give students time to research designs that represent their own cultural backgrounds. Maybe their ancestors are from Ireland, Japan, Spain, Guatemala, or Sweden. Or maybe they don’t know their heritage, but they have designs that they like on a favorite shirt, backpack, or notebook that speaks to who they are and what they like. Have students sketch designs that symbolize and represent them. Avoid copyrighted images and cartoon figures.
- For a quick project have students draw a simple contour shape of a plate, tile, or vase on a 9×12-inch piece of paper and then add their designs and symbols. For younger children, you might provide a variety of pre-drawn shapes from which the children can choose.
Alternative Lesson with Clay:
Day 1:
- If time and facilities are available, you could also create a clay tile that is burnished and has designs painted with slip. Have students make a paper template the same size as the tile. This can be whatever size you envision, but around 5×6 inches is usually a good size. Students should use the symbols they came up with to draw a design for their final clay tile on their paper template.
- Give students enough clay to roll into a small slab of even thickness, about ¾ inch thick throughout, that is a bit bigger than their 5×6-inch template to allow for shrinkage. Place the clay on a flat surface and cover it very loosely with plastic. Let the clay dry slowly, so that it is almost but not completely dry.
Day 2:
- After a day or two, hand the tile back to students carefully. Give each student a smooth, round stone—this could be a small landscaping stone or a stone from the floral and craft aisle of a store. Students should carefully burnish their clay tile until it is shiny.
- Students can place their template on their clay and poke holes with a needle tool, toothpick, or straight pin through their paper and into the tile, incising their design onto the tile.
Day 3:
- Buy or mix up slip and provide a bowl of slip and brushes for each group of 2–3 students. Have students paint inside or outside their designs, depending on whether they want the shiny areas to be positive or negative. Remind them that the areas painted with slip will be matte.
- Fire the clay pieces and hand them back to the students when finished.
Materials
- Drawing paper
- Pencils or other drawing supplies
- About the Art section on Plate (included with the lesson plan) or student access to this part of Creativity Resource online
- Color copies of Plate for students to share, or the ability to project the image onto a wall or screen
- Optional: Clay
- Optional: Clay tools, including rolling pins or a slab roller and needle tools or toothpicks
- Optional: Smooth rocks for burnishing, such as landscaping or floral stones
- Optional: Clay slip and brushes to apply slip
Standards
- Social Studies
- History
- Geography
- Understand people and their relationship with geography and their environment
- Visual Arts
- Invent and Discover to Create
- Observe and Learn to Comprehend
- Relate and Connect to Transfer
- Envision and Critique to Reflect
- Language Arts
- Oral Expression and Listening
- Research and Reasoning
- Critical Thinking & Reasoning
- Information Literacy
- Invention
- Self-Direction
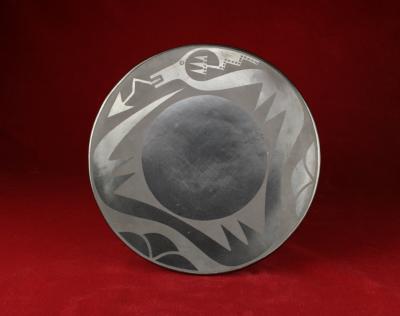
Plate
Diameter: 9.75 in.
Gift of Frederic H. Douglas, 1954.457
Photograph © Denver Art Museum 2009. All Rights Reserved.
Maria Martinez is probably the most famous American Indian artist of the twentieth century. She was born in the late 1870s and produced pottery for over eighty-five years until her death in 1980. She learned the art of pottery-making from her aunt, Nicolasa Peña. Maria and her husband Julian created the first black-on-black pottery, of which this plate is an example, in the early 1900s. In Pueblo tradition women shaped and polished the pots, while men were responsible for painting the surface with designs. Maria and Julian worked within this convention.
Maria and Julian lived in San Ildefonso [ILL-day-FON-so] Pueblo, near Santa Fe, New Mexico. Their innovative methods and designs shaped a new tradition for San Ildefonso pottery and influenced many artists both within and outside the American Indian community. The black-on-black pottery was so popular with collectors that Maria began teaching the firing technique to others, and by the mid 1920s nearly all San Ildefonso potters were making black ware. Maria also shared her skills with her children and grandchildren, and many of her descendents carry on her legacy today through their own pottery.
Maria and Julian began producing black pottery after an archaeologist asked them to recreate whole pots based on pieces of pottery that were found in the ruins of ancestral Pueblo homes. The couple experimented with various methods of firing the pottery and eventually achieved the black color by blocking oxygen from the pottery as it was fired. After discovering this technique, Maria and Julian continued to improve upon their pottery. Maria became extremely skilled at creating beautiful forms and achieving a smooth, glossy surface. Julian painted designs on the pottery after it was polished. He used a fine clay slip (a mixture of clay and water), which resulted in matte areas that provided a contrast to the highly polished background. In the beginning Maria was quite skeptical that black pottery was a part of her heritage. Until she finally acquiesced, she hid pottery she and Julian were making underneath the bed.
Drawing upon their heritage, Maria and Julian decorated their pottery with traditional Tewa [TAY-wah] designs. The design on this plate is an avanyu [ah-VON-you], a horned water serpent. The jagged line that comes out of the serpent’s mouth represents lightning, and the curves of its body symbolize flowing water. According to Santana, Maria and Julian’s daughter-in-law, Julian was the first painter at San Ildefonso Pueblo to use the avanyu decoration. “I think he got it from paintings on old pottery from the ruins,” she says. “Julian was a real artist, a real painter. He used to fill little notebooks with ideas for designs—he carried it wherever he went.”
Details

Black-on-Black
Maria and Julian produced their first black-on-black decorated piece in 1919. This technique brought the couple worldwide acclaim, though they had been producing pottery for years prior to this time. The pottery is buried in ash during the firing process to keep out oxygen, causing the clay to turn black rather than red. Maria was once quoted as saying, “Black goes with everything.”
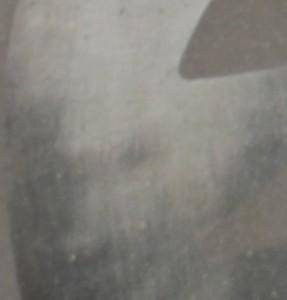
Shiny Surface
In order to achieve the glossy surface you see here, the pottery is first burnished with a stone to a high polish. This occurs before the piece dries completely, prior to firing. There is no glaze used in this process. Maria is admired for the mirror-like surface she could achieve using a stone to burnish the clay.

Matte Black
Designs are painted onto the polished surface of the piece with a fine clay slip, creating matte areas that contrast the shiny surface. Julian used the same clay that was used to make the plate to paint the matte design.
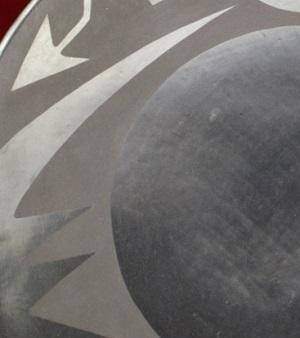
Form
Maria made all of her pottery by hand, without the aid of a potter’s wheel. To smooth and shape pottery she used a scraper made out of a gourd. The smooth forms and shiny surfaces that she could achieve by hand are a testament to her incredible skill as a potter.
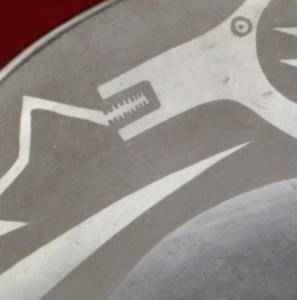
Serpent Design
Julian painted the avanyu design on many of the couple’s pieces.
Funding for object education resources provided by a grant from the Morgridge Family Foundation. Additional funding provided by the William Randolph Hearst Endowment for Education Programs, and Xcel Energy Foundation. We thank our colleagues at the University of Denver Morgridge College of Education.
The images on this page are intended for classroom use only and may not be reproduced for other reasons without the permission of the Denver Art Museum. This object may not currently be on display at the museum.
